
Plan a Project with Q-Link
As with any Quuppa systems, the first step is to create a project file using the Quuppa Site Planner (QSP) software that will serve as the plan for how to deploy the system. To plan a project using the Q-Link feature, there are a few extra steps in addition to those that you are familiar with when planning a wired setup. These instructions will walk you through the steps of creating a project file using the Q-Link feature.
- Create a project plan in the QSP as you would for any other Quuppa project, i.e. create a new project file, add a background image, modify the tracking area as needed and add the various project objects needed for your project such as Locators and zones.
-
Mark the Locators that you plan to use as satellites in the project plan, keeping in mind that the distance between hub Locators and satellite Locators should not exceed 15 meters in a confined or semi-confined environment and 40 meters in an open environment, and the maximum number of satellite Locators per hub Locator is 4:
-
Select the Locator, either object tree on the left or in the map view.
-
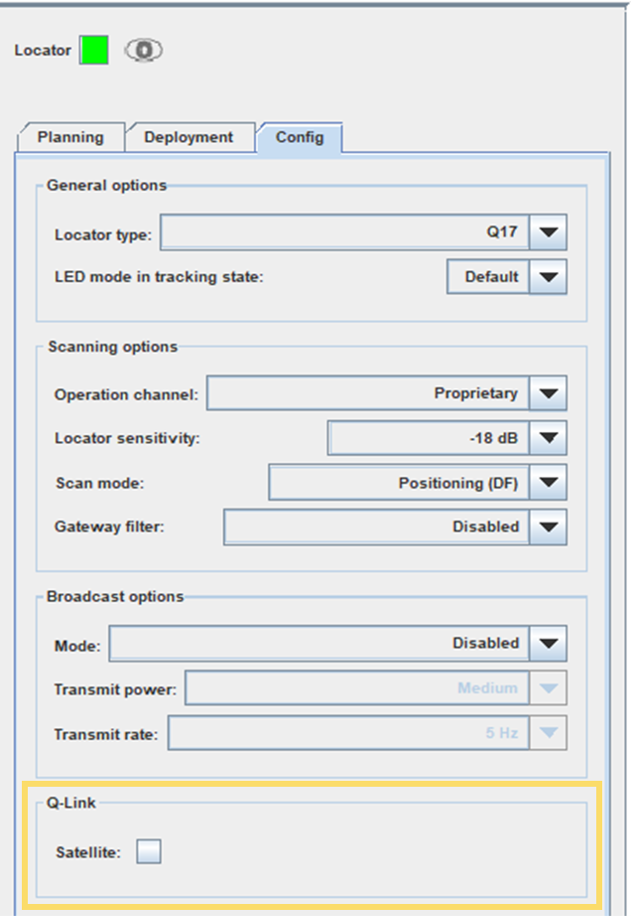
Open the Config tab in the panel on the right.
-
Check the box for Satellite in the Q-Link settings.
-
In the map view, the QSP will change the Locator's colour to green to indicate that it is a satellite Locator and show a blue line to an Ethernet cabled hub Locator that this satellite could connect to. Use this information to evaluate whether you have enough hubs in your project to provide connectivity for your planned satellite Locators. If you apply more than 4 satellites per hub, the QSP will issue a warning to let you know that you need to add more hubs or reduce the number of satellites.
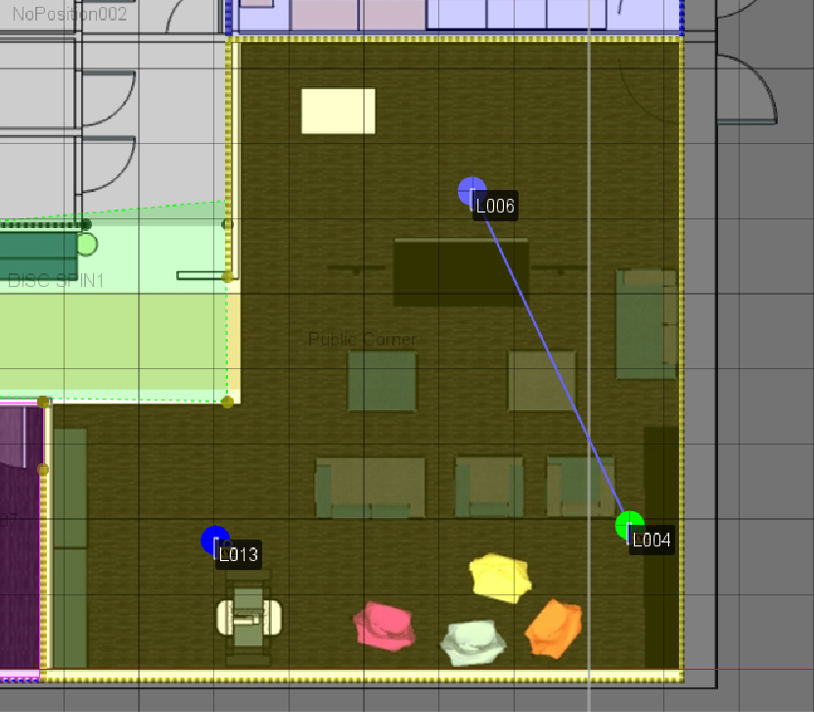 Important:The connection lines shows by the QSP are best guess estimates for likely connections and the conditions in the real environmental may prompt the QPE to select a different configuration of satellite Locators to hub Locators once the project is running on the QPE.
 - Repeat steps a-d for all the satellite Locators in your project.
-
-
If you are only using the hub Locators to provide connectivity for the satellite Locators (i.e. excluding them from participating in the positioning of tags, Option B described in section Prepare to Take Q-Link into Use), change the scan mode for the hub Locators accordingly:
-
Select the Locator, either object tree on the left or in the map view.
-
Open the Config tab in the panel on the right.
-
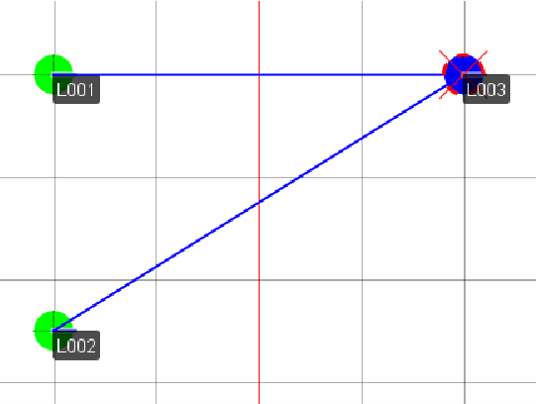
Use the Scan mode drop-down menu to select Proximity (RSSI).

Locators set to the Proximity (RSSI) scan mode will be shown with a small red cross over them in the QSP map view to indicate that they will not participate in positioning.
 Note:If you change your mind later and want to start using the hub Locator for positioning as well, you can do so by changing the Locator's scan mode setting back to Positioning (DF) and checking that the Locator is installed so that it can be used for positioning. Remember to save and resubmit the project file to the Quuppa Customer Portal and perform a file sync with the QPE whenever you make changes to the project file.
 -
Repeat the steps a-c for all the hub Locators in your project.
Note:If you are using hub Locators for both positioning and connectivity for the satellite Locators (Option A described above), then you can skip step 3 as the default scan mode setting for Locators is Positioning (DF).
-