Add Locators to Tracking Areas
This option is often used in spaces where a higher floor partially overlooks a lower floor, such as an atrium in an Smart Building or a mezzanine level for offices in a factory. The different floors have their own coordinate systems as they are spatially distinct areas of the project, but Locators placed at the edge of the upper floor may also provide coverage over the edge of their coordinate system for the floor below and so can be used for positioning in the tracking areas for both coordinate systems. While Locators on the upper floor may provide coverage for the both floors, the coverage provided by the Locators on the lower floor doesn't extend to the coordinate system for the upper floor and so none of the lower floor's Locators are added to the coordinate system for the higher floor.
To add the Locators to a tracking area, follow the steps below.
- Open the project in the QSP.
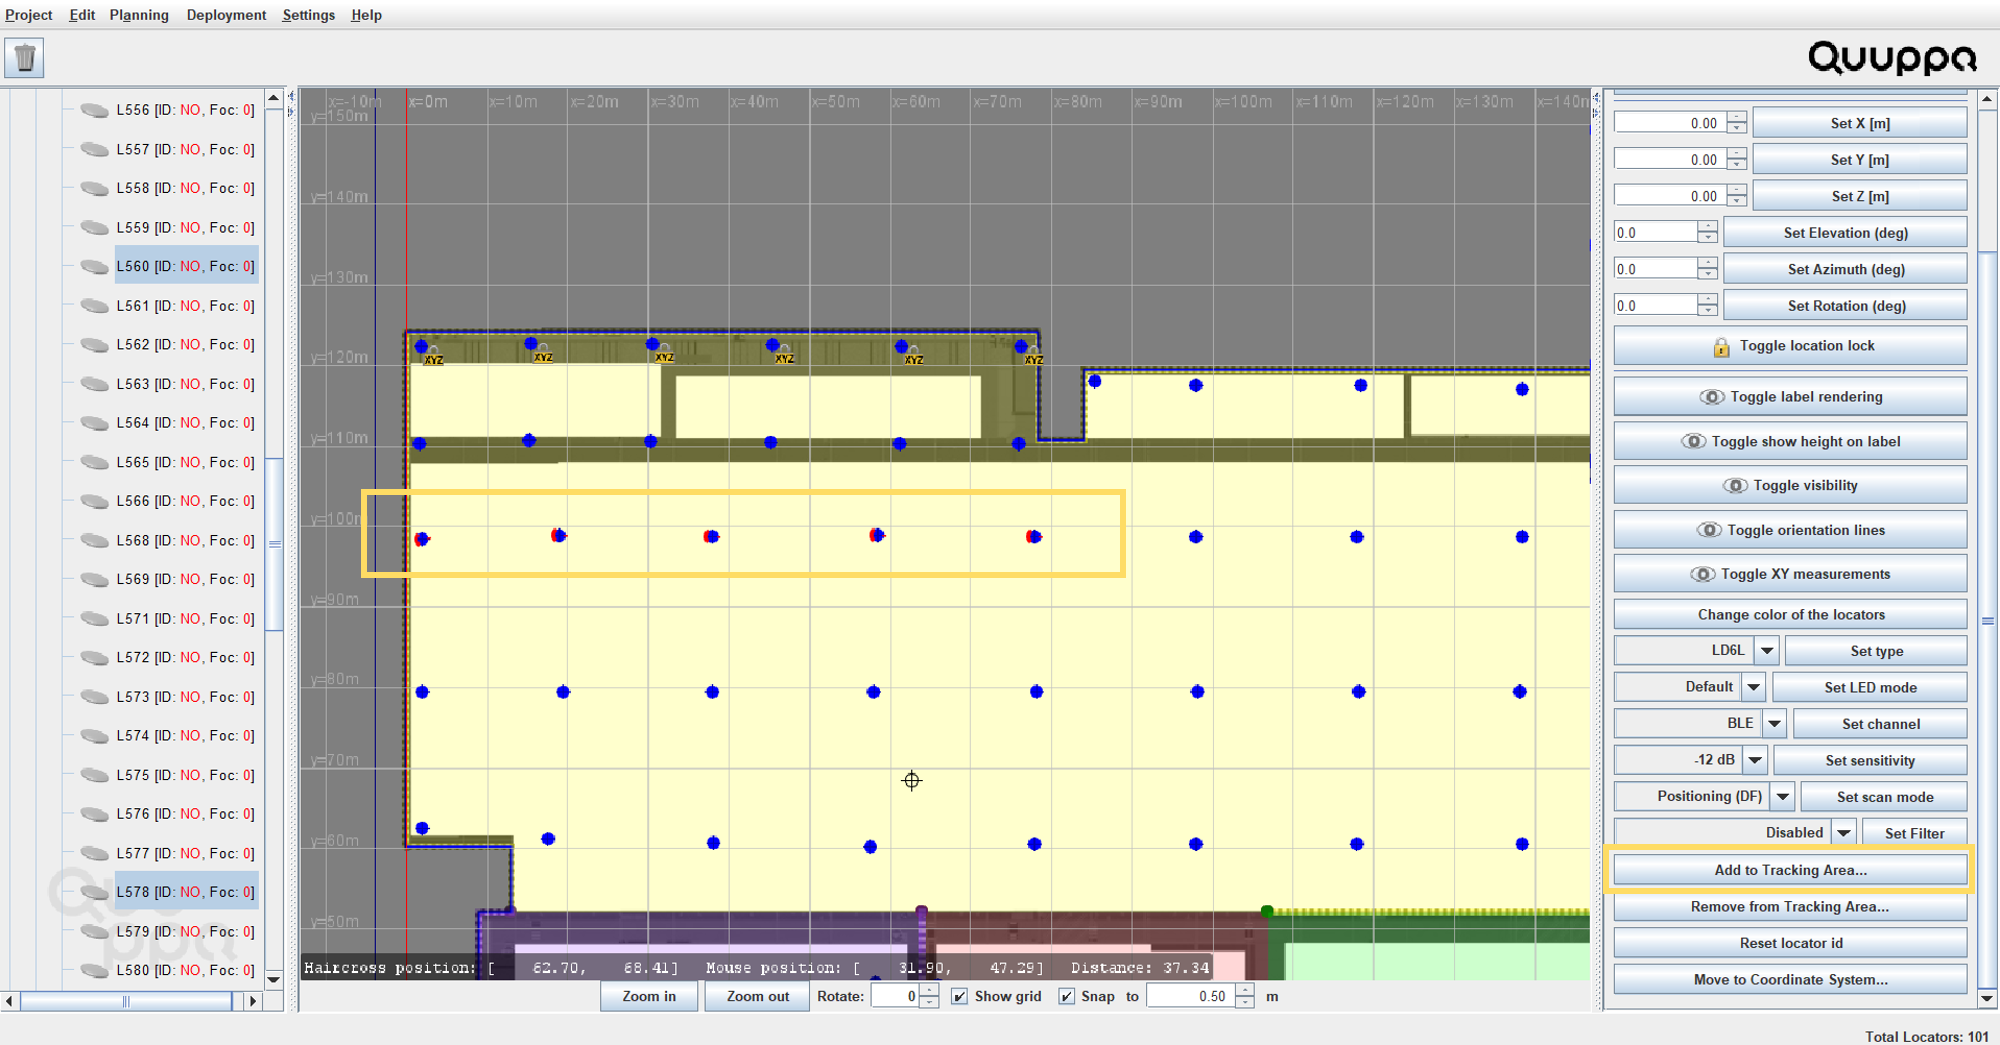
- In the object tree on the left, select the Locators that you want to added to a tracking area.
-
In the panel on the right, click the Add to Tracking
Area... button.

-
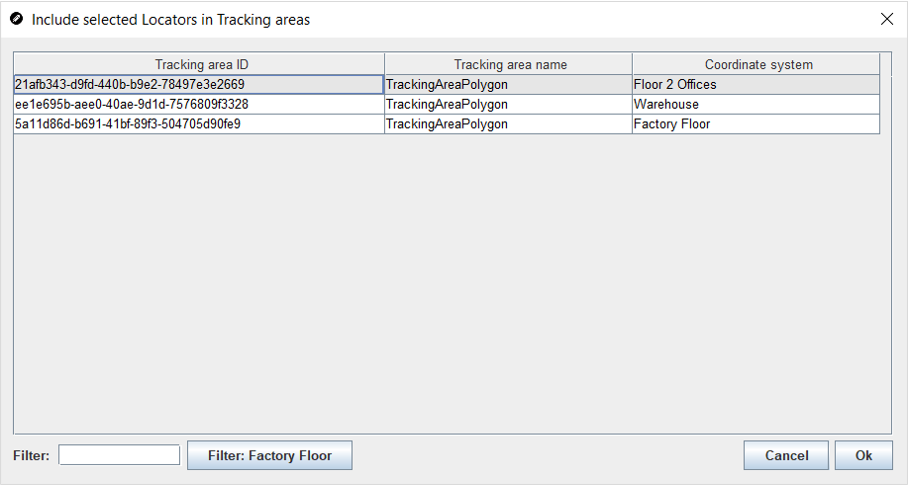
In the window that opens, select the tracking area where you would like to add
the Locators and click the OK button.
 Note: This is a good example of where it is useful to have specific and descriptive names for your tracking areas and coordinate systems. It is much easier to sort through the names than the Tracking area ID numbers.
 -
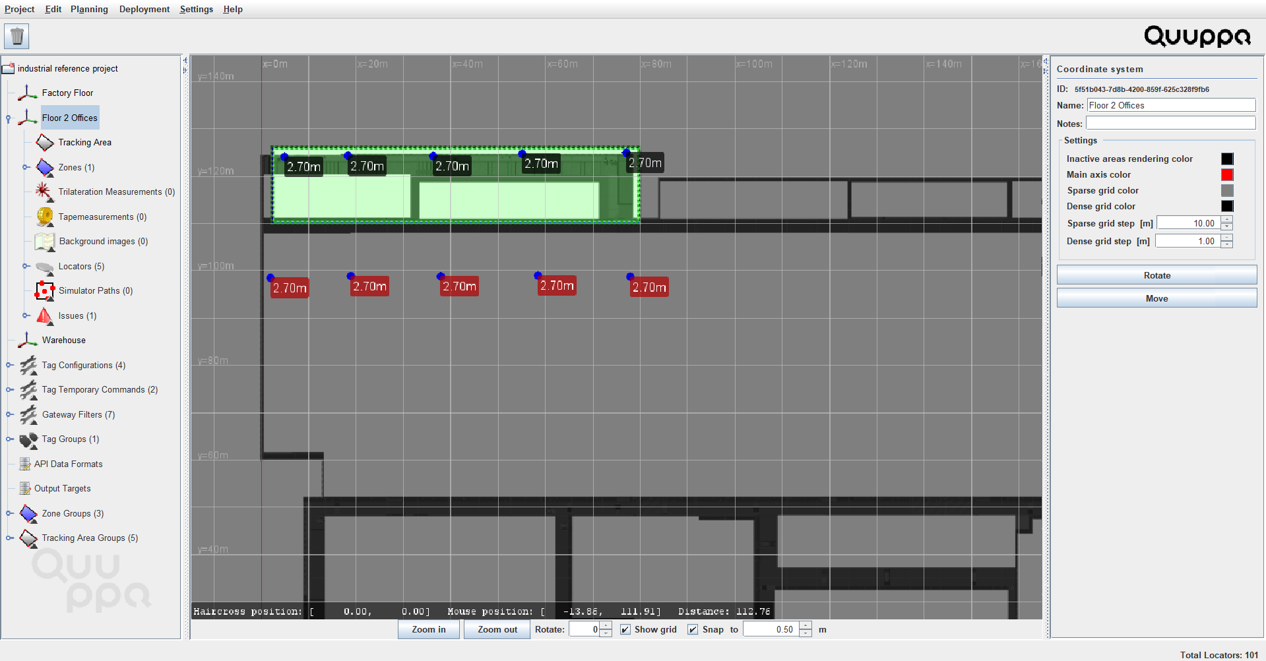
To check that the Locators were added correctly, navigate to the tracking area
that you selected using the object tree. The added Locators will show with red
labels that indicate the Locators belong to another coordinate system even
though they are shown here.

