Add New Tracking Area
The tracking area is a defined area within the project's coordinate system in which you want to enable tracking. This section will walk you through adding a new 2D tracking area for your project. For more information about 3D deployments, please see the 3D tracking areas section of this guide.
- Open the project in the QSP.
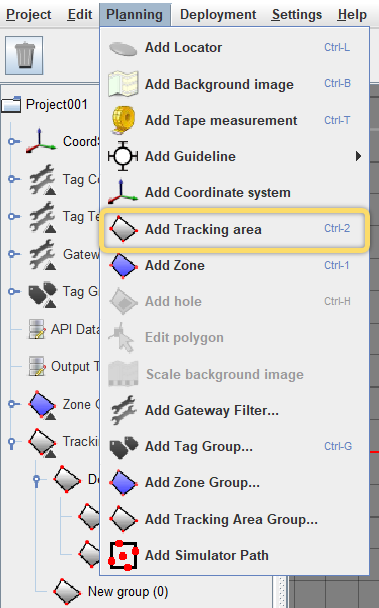
- In the menu bar at the top, select the Planning menu.
- Select Add tracking area from the menu.

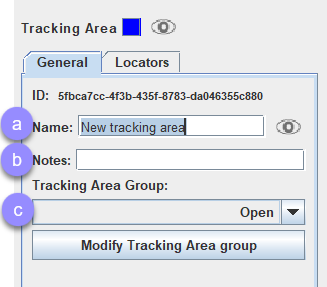
- In the object info panel that opens on the right, add the following details for
the tracking area:

- Name - Give the tracking area descriptive name so that you can identify it later.
- Notes - Add any notes that will helpful in identifying the object later.
- Tracking Area Group - Select the tracking area group that this tracking area will belong to. All new tracking areas will be added to the Default group if no group is otherwise specified. For more information about creating new groups, please see the Add Tracking Area Groups section of this guide.
- Next, edit the tracking area polygon to suit your project. For more information, please see the Edit Tracking Area Polygon section of this guide.
