Setting up Generation Q Only Projects
Note: You will need to have a valid subscription for all of the
Generation Q Locators in this project.
-
To create a new project or start using an existing project:
- Open the latest version of the QSP.
- Create a new project and select the appropriate default Locator type
(e.g. if the majority of your Locators are Q17, select
Q17) .Note: Alternatively, you can also open an existing project.
- Add new Locators to the project.

- Install the Locators.
- Position, identify and focus the Locators.
- Configure the tags.
- Save the project.Note: For more information about these steps, please refer to the Development Kit Quick Start Guide.
-
To find the right key for the project in the QCP:
- In the dashboard, click on My Subscriptions to open the list of available subscriptions.
- Select the relevant subscription by clicking on the Subscription ID number to open the Subscription details page.
- Create a new project key by clicking the Create project key
associated to this Subscription button.
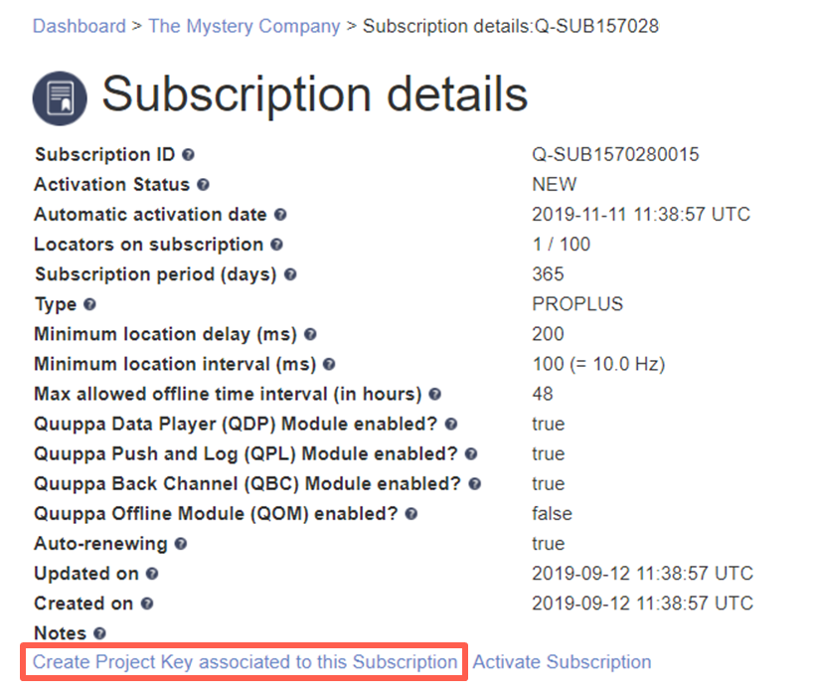 Note: It is good practice to add a note (e.g. the name of the project) to the project key.
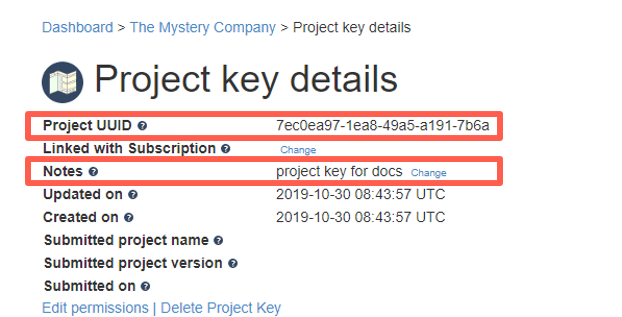 Note: Once the project key has been created, the details can be viewed in the Project Key Details page: Dashboard > Company name > Project Keys.
-
To associate your project with the new project key:
- Return to the project in the QSP.
- Select the project folder in the object tree on the left.
- In the object info panel on the right, go to the
General tab and click the Associate
with a key button.
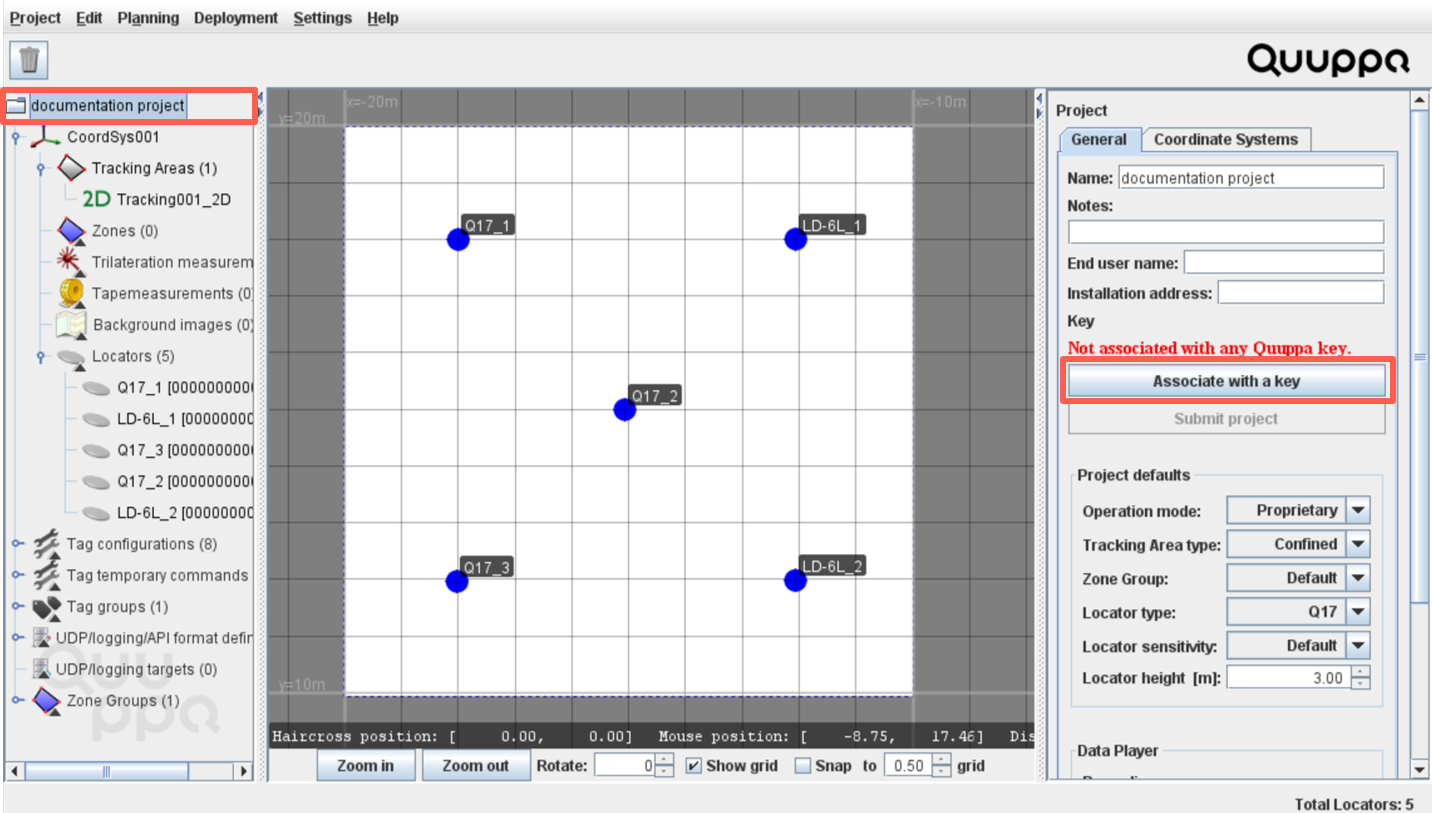
- Find the relevant project key in the panel that opens, select it and click the Associate with selected key button.
-
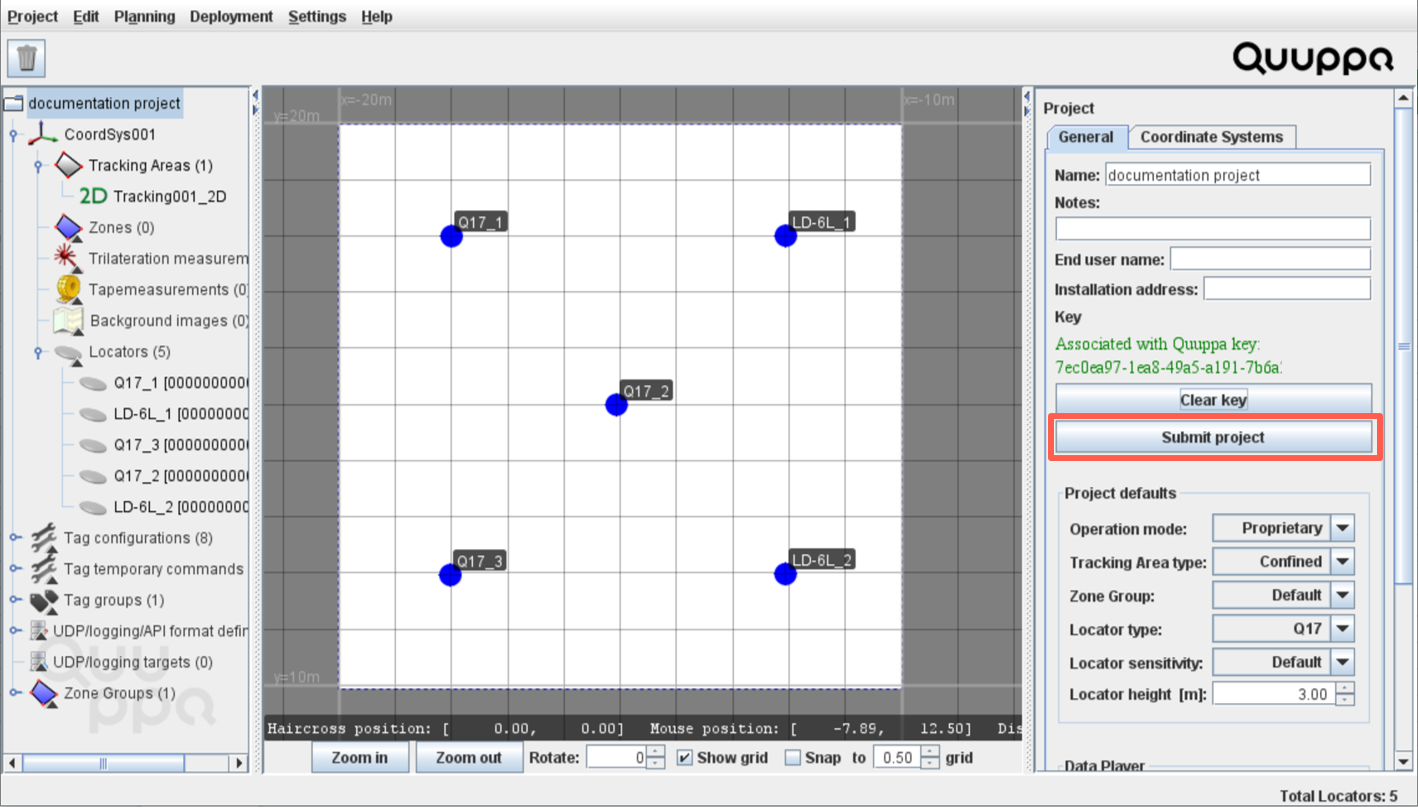
Submit the project in the QSP by clicking the Submit
project button in the object info panel on the right and close
the QSP.
-
To activate the project in the QPE Web Console:
- Start the QPE.
- Open the QPE Web Console.
- Click the Set New Key button to associate the
project with the project key. The QPE will perform a file sync.
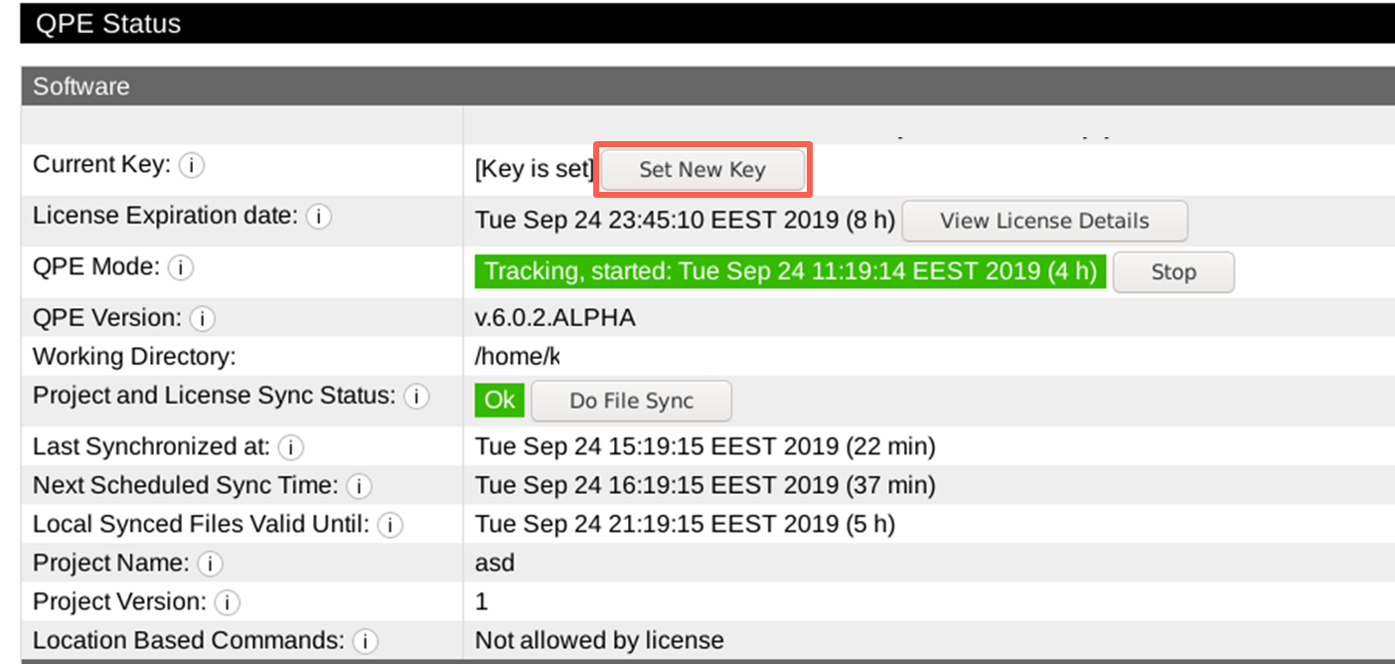
- Start the QPE in tracking mode. Note: It may take a moment for all of the Locators to show in the Locator table.
Congratulations, your project is now up and running!
